Shop Settings
Your salon-wide booking rules and team permissions
Shop Settings holds two things that shape how your whole salon runs: the booking rules your team works by, and the permissions that decide who can do what. It has two tabs.
Note: Shop Settings is available on the Pro plan and up.
In this article
- Booking preferences
- Roles and permissions
Booking preferences
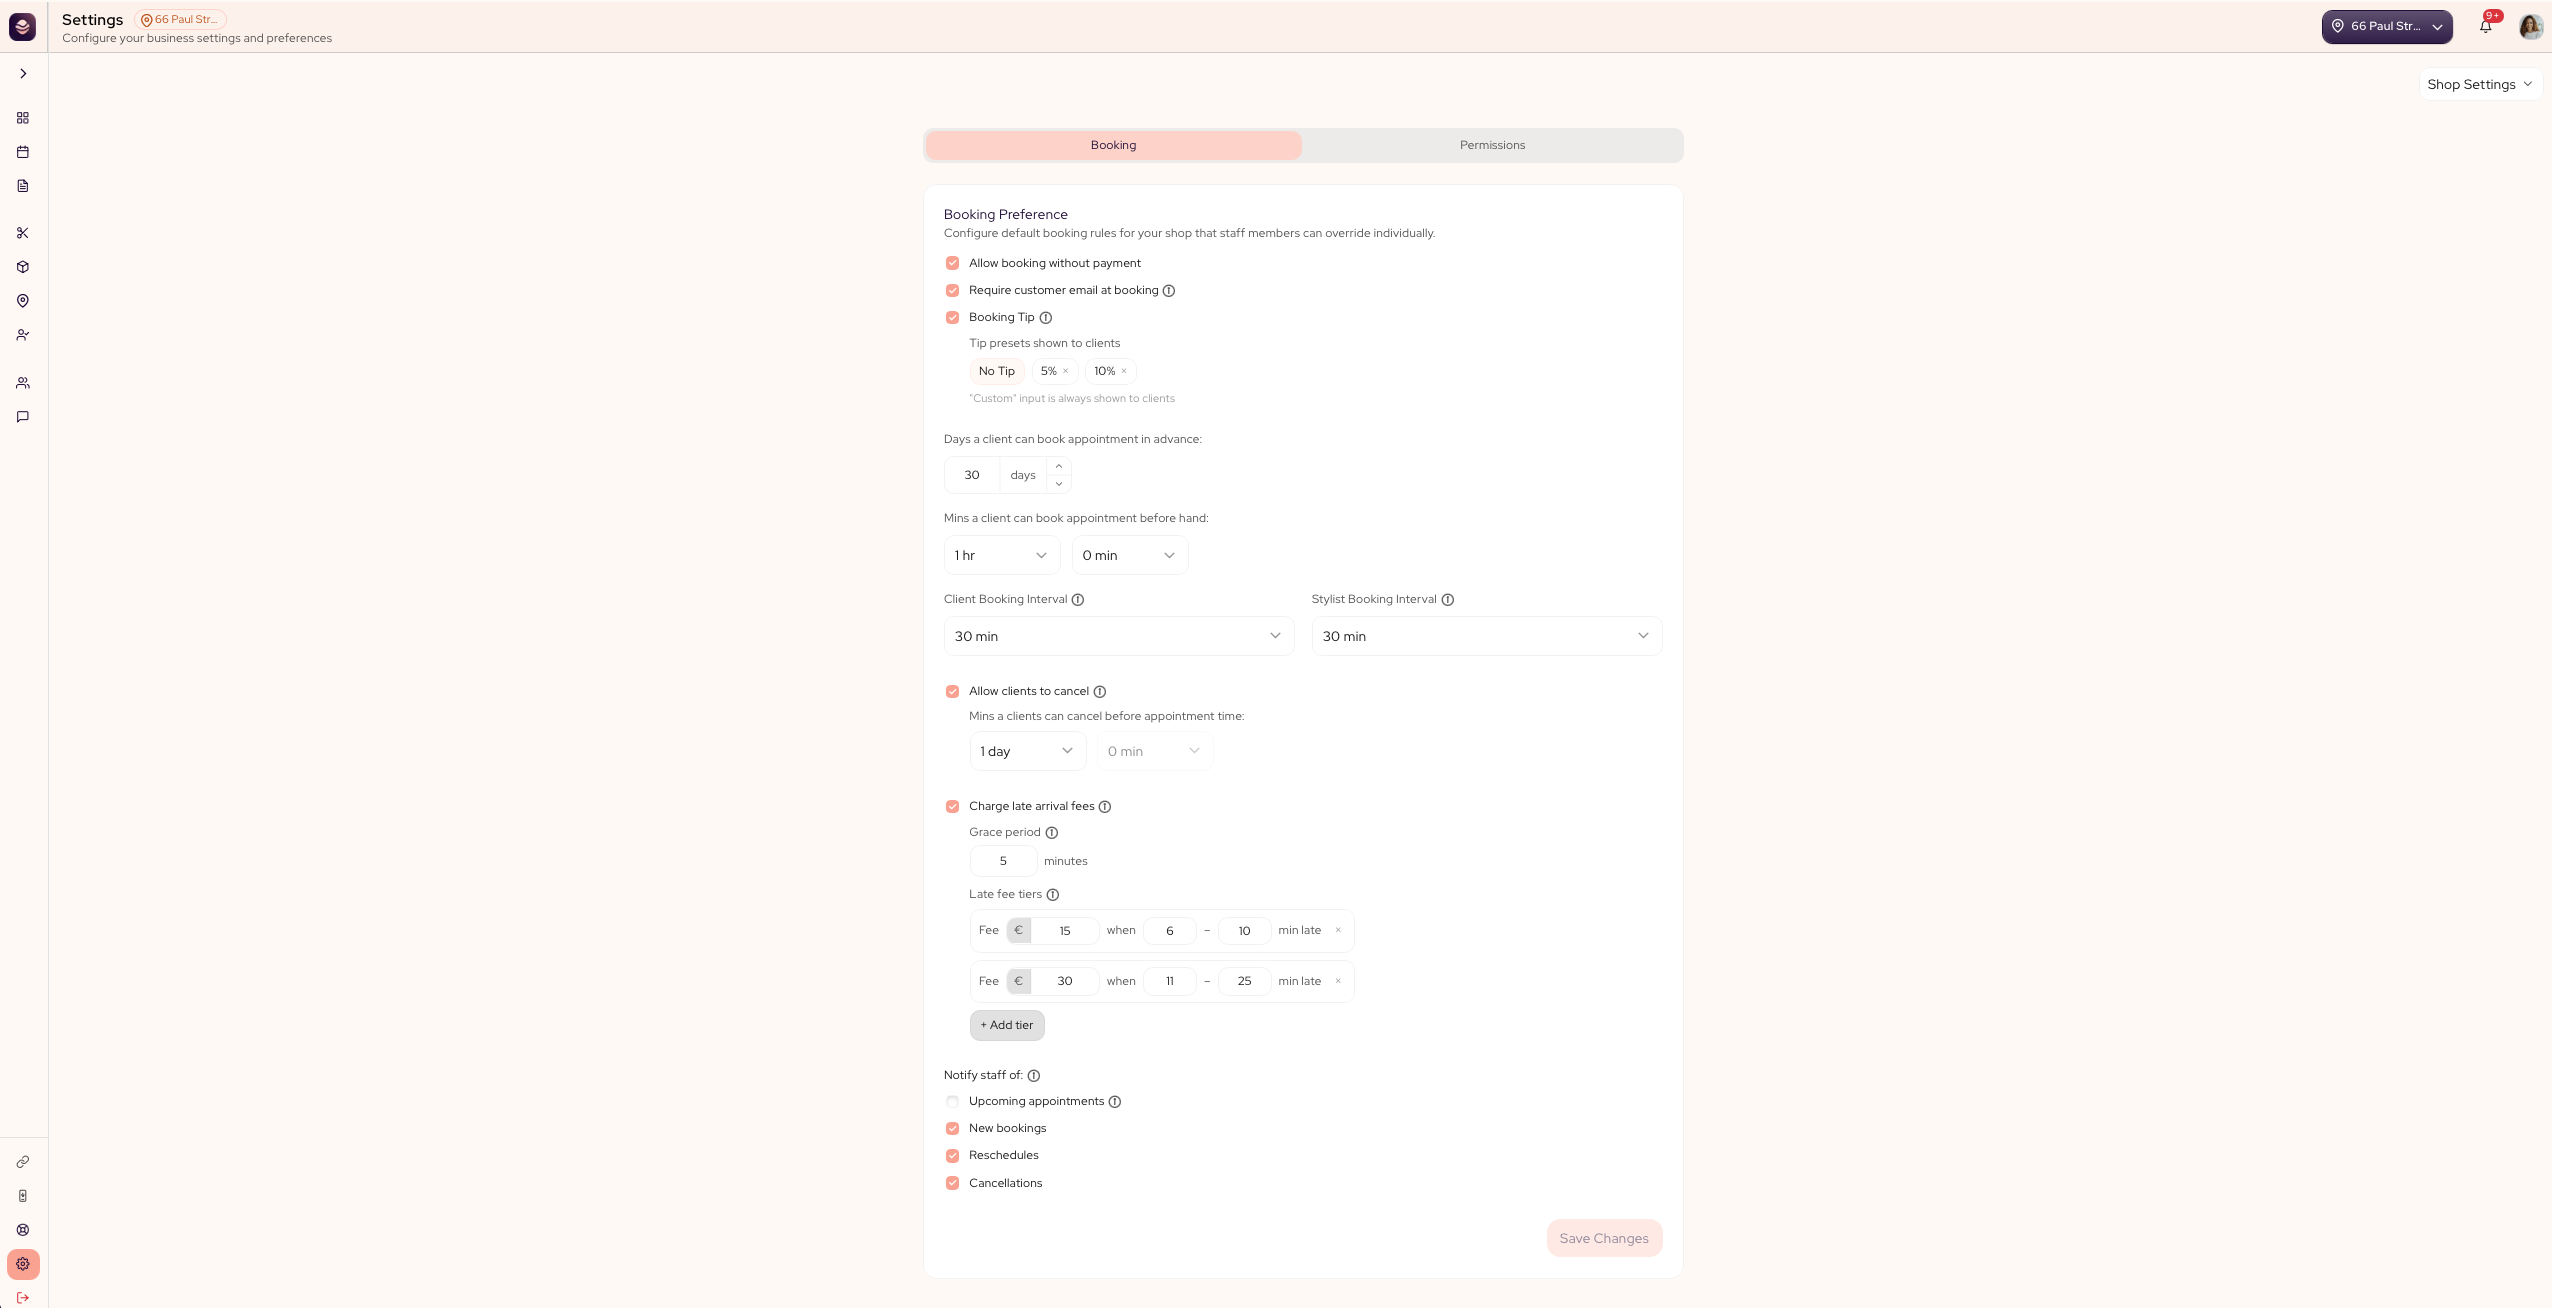
The Booking tab sets the default rules your whole salon books by. Every team member follows these unless you give them their own rules.
Here is what each option does:
- Allow booking without payment lets clients book without paying upfront. Turn it off to ask for payment or a deposit to hold the slot.
- Require customer email at booking asks for an email when a client books. Turn it off and a phone number is enough to book.
- Booking tip shows tipping during the booking flow. You set the tip presets clients see, and a custom amount is always offered.
- Days a client can book in advance sets how far ahead clients can book.
- Minutes a client can book before an appointment sets the least notice a client must give, so you avoid last-minute bookings.
- Client booking interval sets the gap between the open times clients see, like every 15, 30 or 45 minutes, or by the length of the service.
- Stylist booking interval does the same for the open times you see in the dashboard.
- Allow clients to cancel lets clients cancel from their booking. Turn it off and they contact you to cancel instead.
- Minutes a client can cancel before an appointment sets how much notice a client needs to cancel.
To set them:
- Go to Settings and open Shop Settings.
- Stay on the Booking tab.
- Set each rule for your salon.
- Save your settings.
Late fees
The Booking tab also lets you charge clients who arrive late.
- Charge late arrival fees turns late fees on.
- Grace period is a window where no fee is charged, so a few minutes late costs nothing.
- Tiers set the fee for how late a client is. Add more tiers to charge more for a longer delay.
When a late fee applies, your team adds it at checkout when they charge the appointment.
You can give one person different rules in their own booking preferences.
Roles and permissions
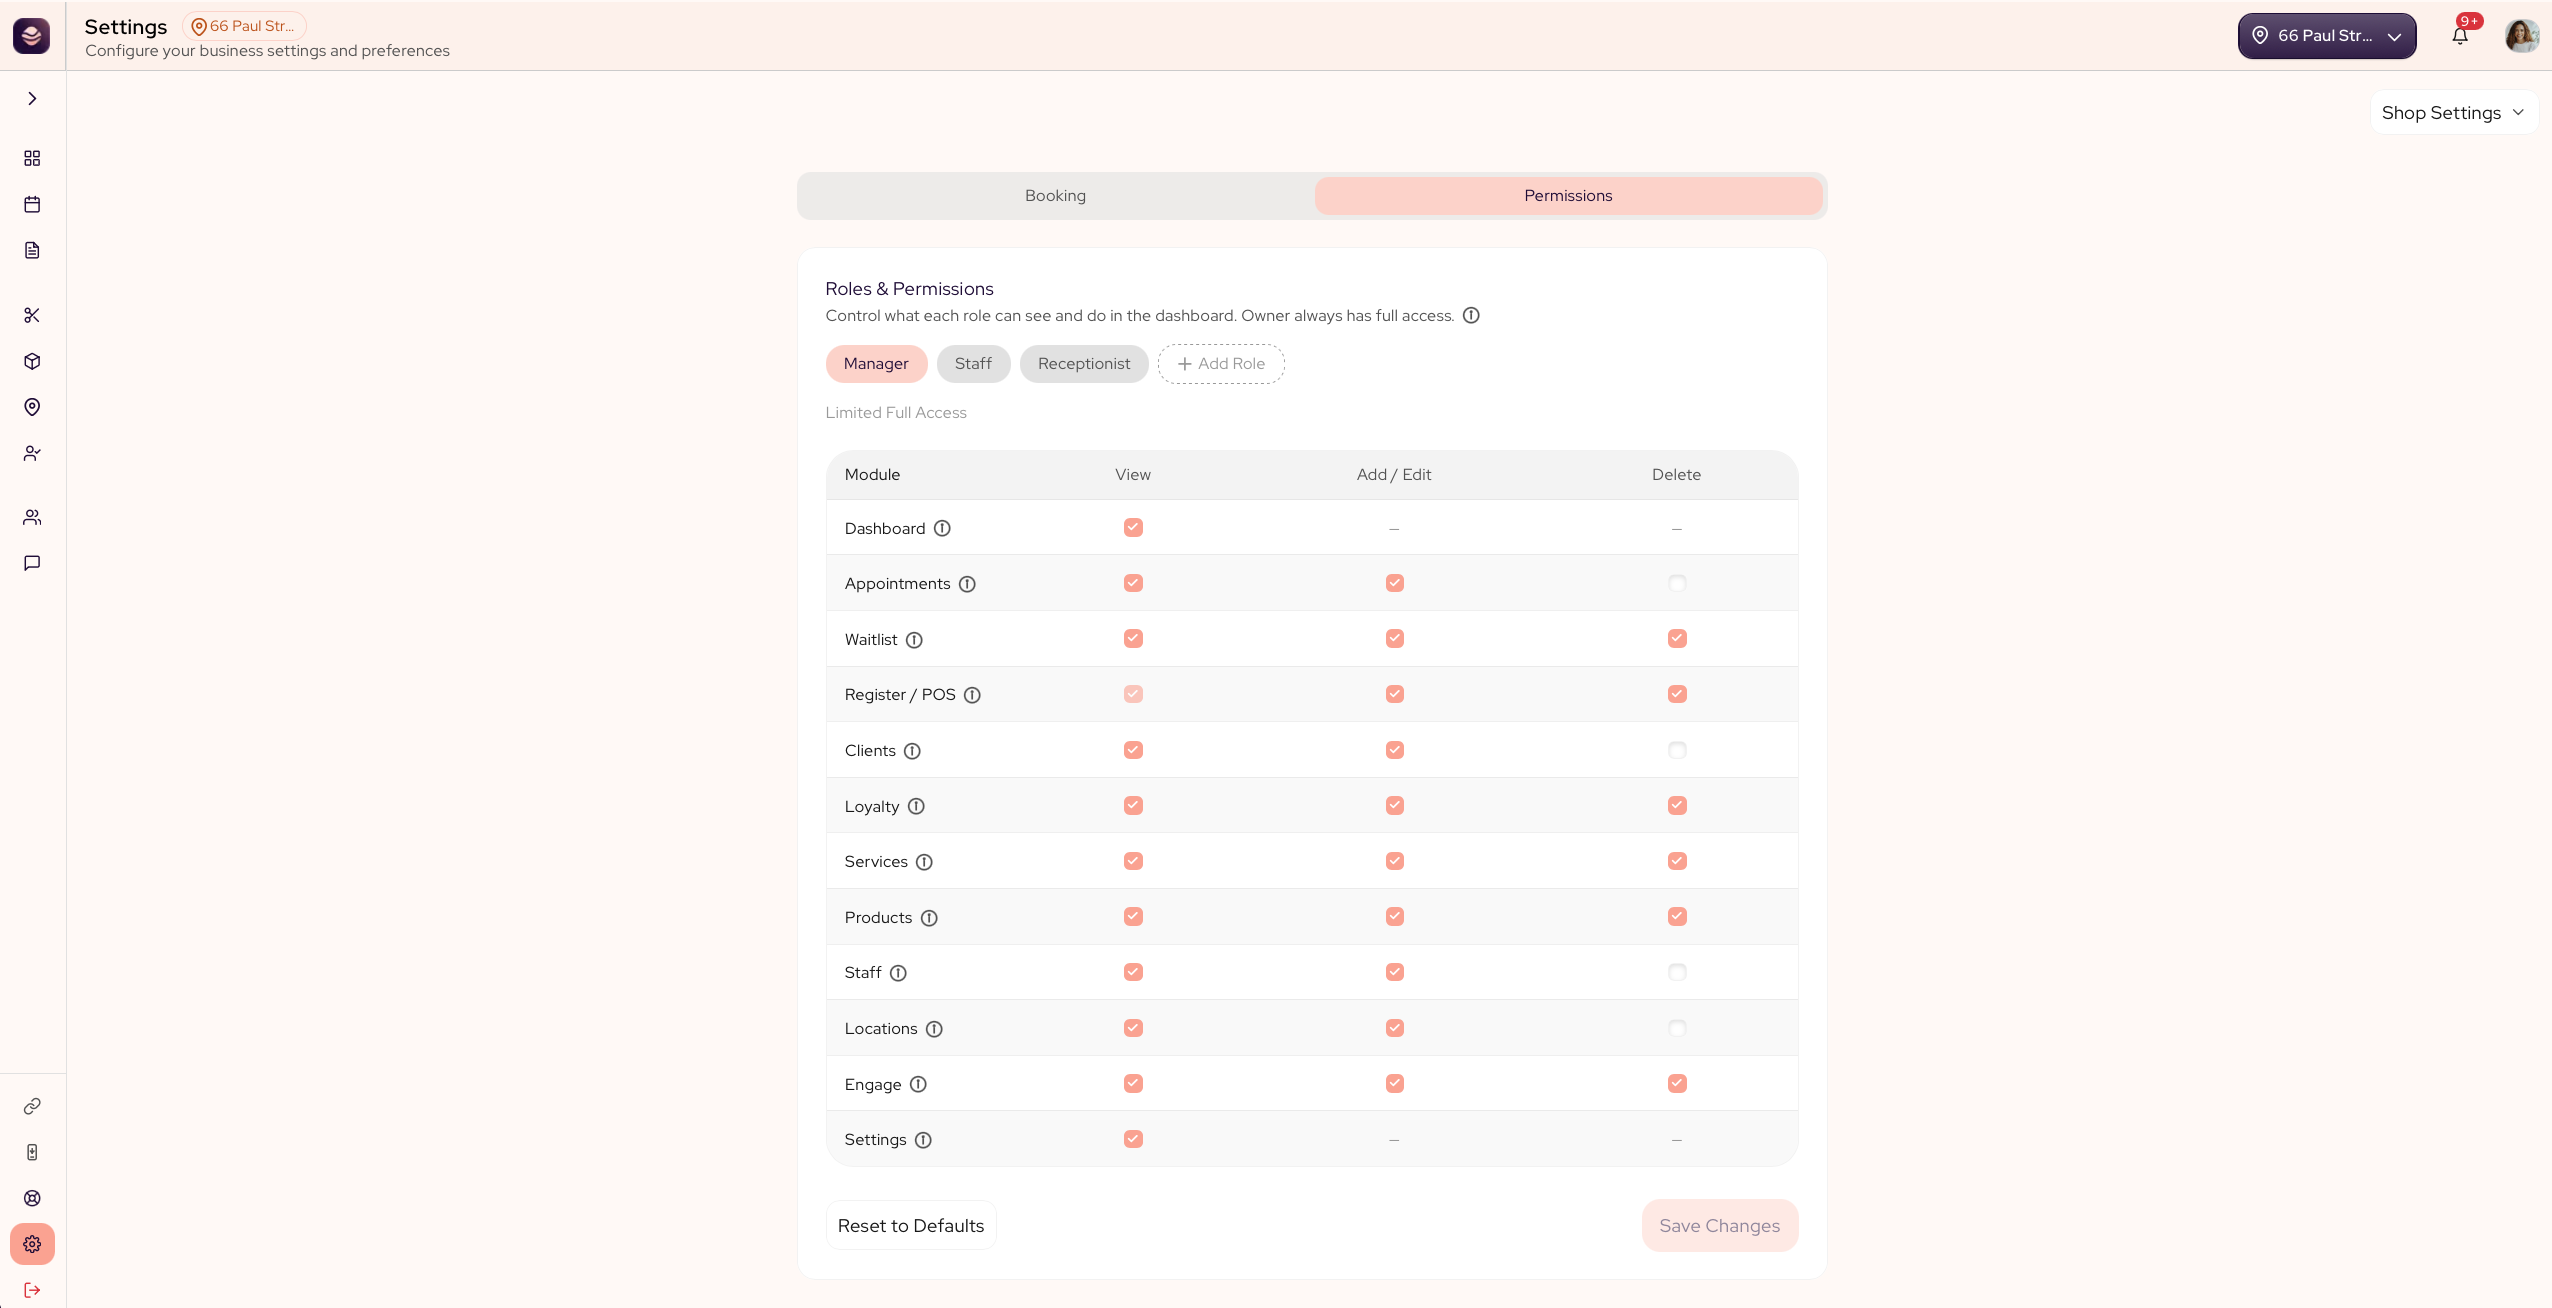
The Permissions tab decides what each role on your team can do, so sensitive actions stay in the right hands.
How permissions work:
- Each role, like Owner, Manager or Staff, has its own set of permissions.
- Permissions are grouped by area: Dashboard, Appointments, Waitlist, Register, Clients, Loyalty, Services, Products, Staff, Locations, Engage and Settings.
- For each area you choose what the role can do: View, Add / Edit and Delete.
Set what a role can do:
- In Shop Settings, open the Permissions tab.
- Pick the role you want to set.
- Tick or untick View, Add / Edit and Delete for each area.
- Save your settings.
Create your own role:
- Add a new role.
- Give it a name, like Receptionist.
- Copy the permissions from a role you already have to start, then adjust them.
- Save your settings.
Note: A permission change can take up to a minute to reach someone who is already signed in.
Tip: Give your front desk what they need day to day, and keep money and account actions with managers and owners.
Related: Set booking rules per person