Add a product
Put an item on your shelf in two steps
Adding a product takes two steps. You give it a name and a home, then set its price and how many you have. Once saved, it is ready to sell at the register.
In this article
- Before you start
- Add a product
Before you start
A product needs a category, so set up at least one first. See organize products with brands and categories. A brand is optional.
The product's location comes from the location picker at the top of your dashboard. Pick the right location there before you add the product, so the stock lands at the right branch.
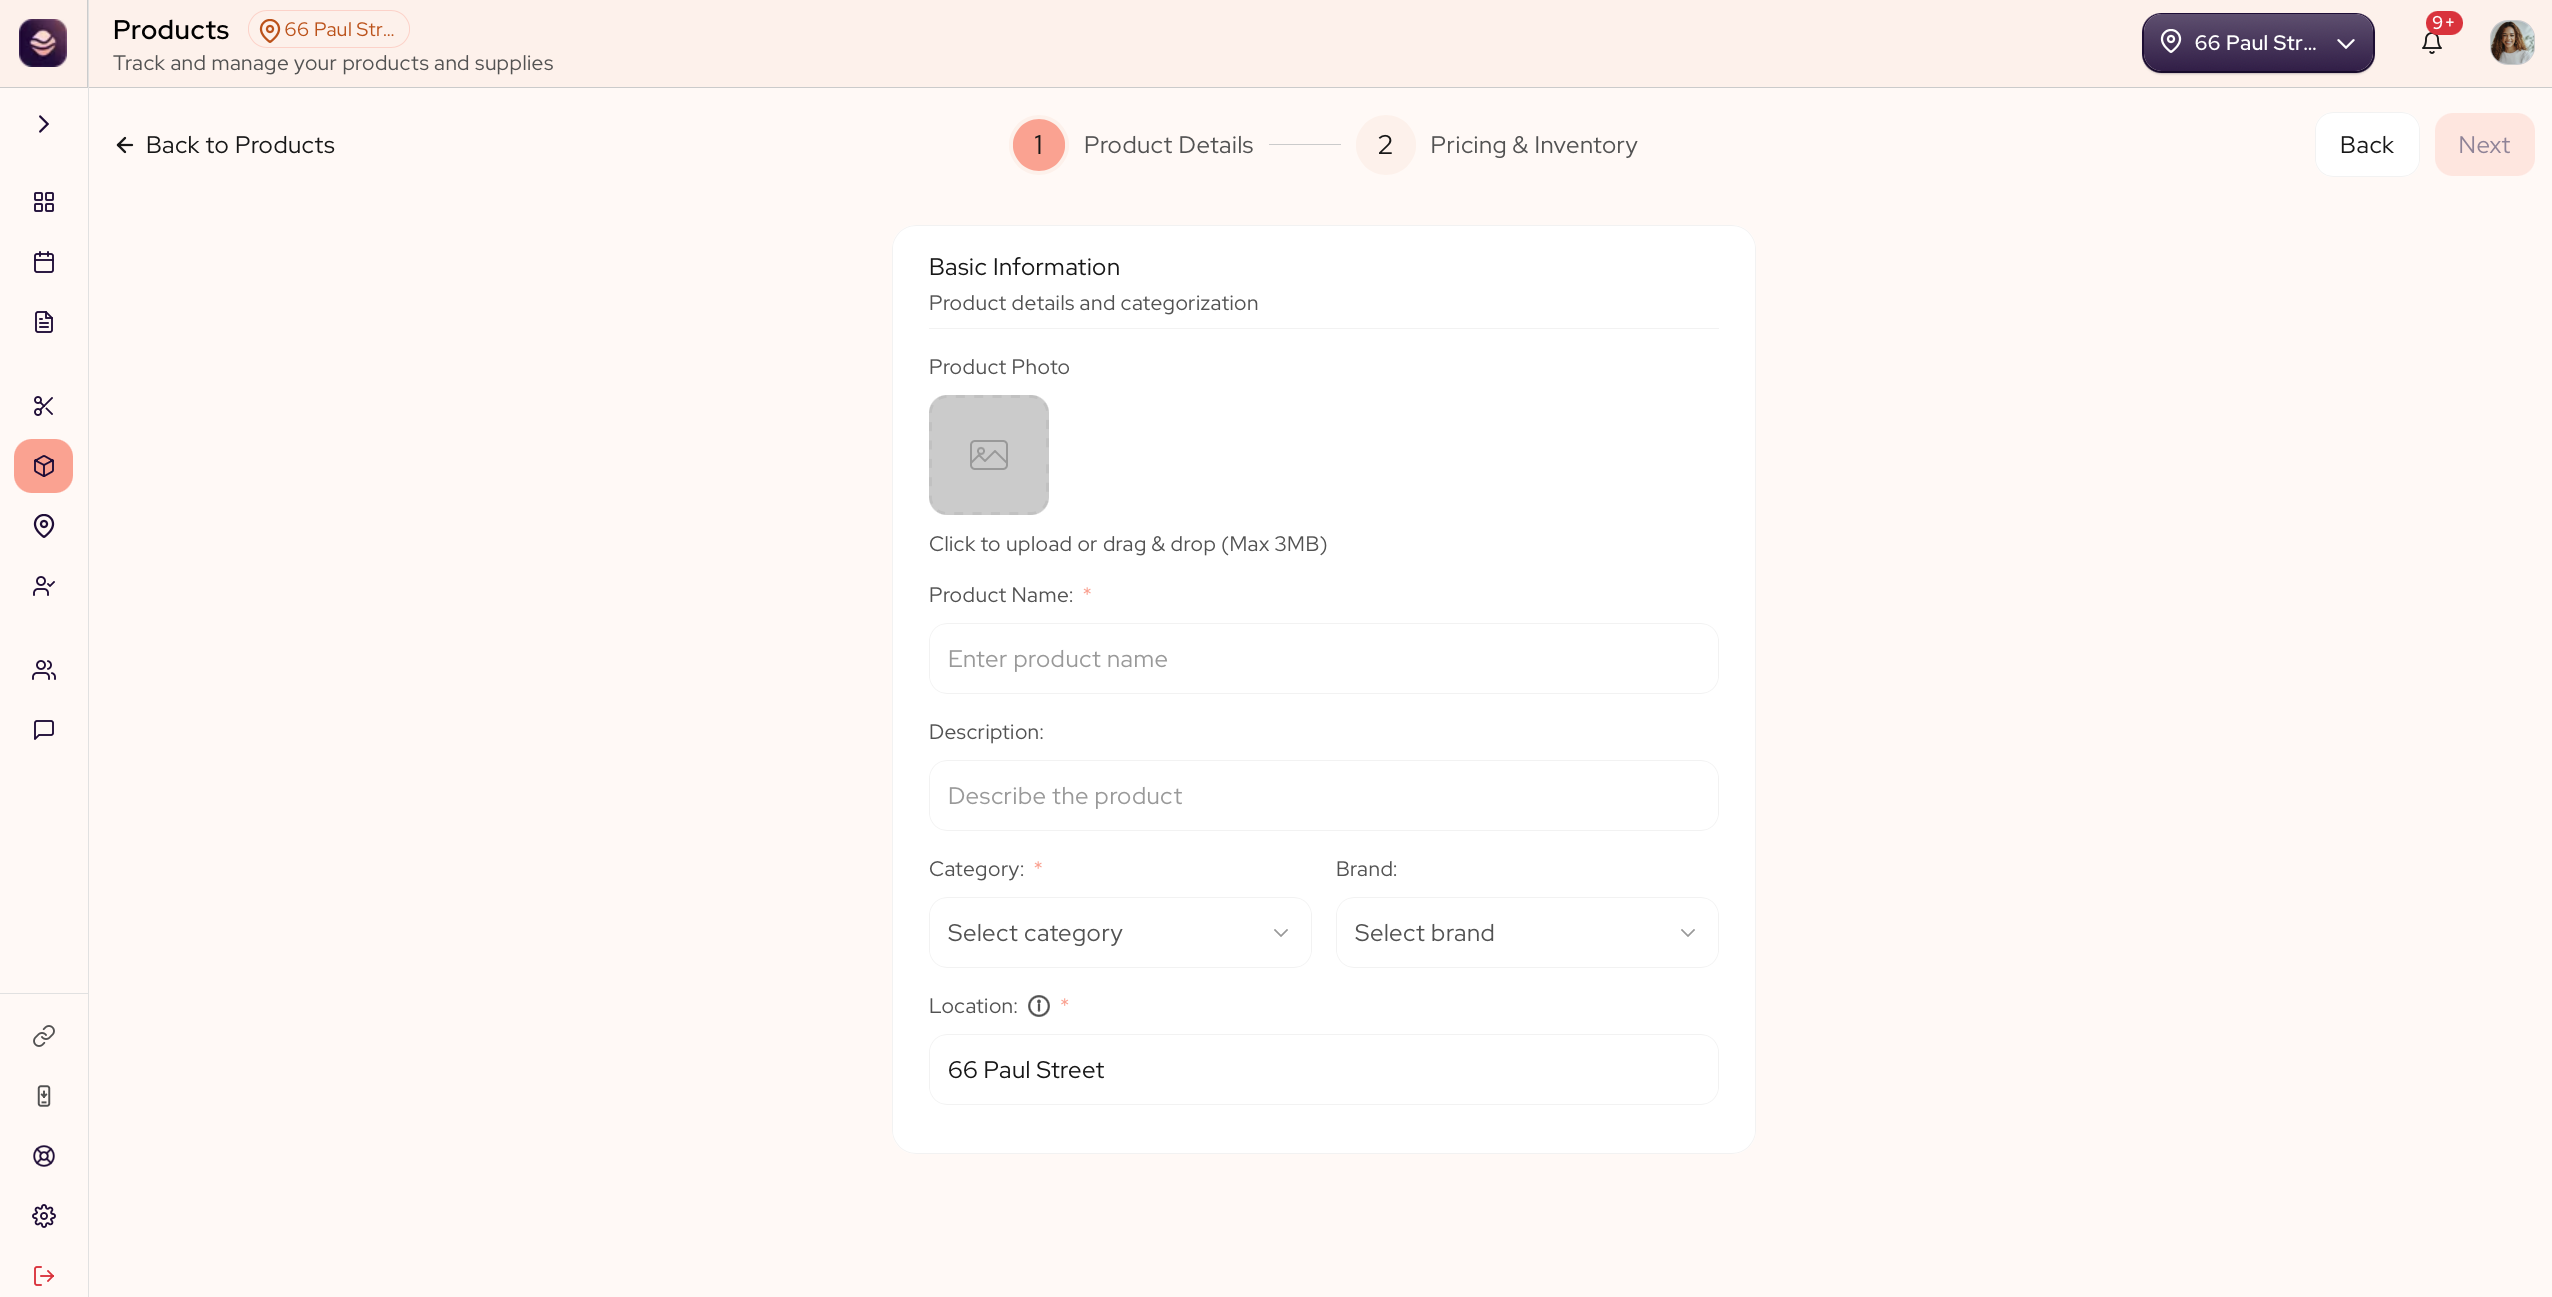
Add a product
- Go to Products.
- Select Add Product.
- Product Details: enter the product name and pick a category. A description, a brand and a photo are optional. The location is set from your dashboard's location picker.
- Pricing & Inventory: set the retail price (what clients pay) and the supply price (what it costs you). Both are required, and together they let your reports show profit, not just sales.
- Enter your total inventory, the number you have in stock.
- Add the optional extras if you want them: an ecommerce price, a low inventory level for alerts, an SKU and a tax type. The SKU fills in for you if you leave it blank.
- Save the product.
Your product is ready to sell at the register.
Tip: Setting the supply price is what lets your reports show gross profit. Skip it and you only see sales, not what you made.
Tip: Set a low inventory level so SalonGrid warns you before an item runs out. See track your stock.
Related: Organize products with brands and categories · Track your stock